

Delivering consistent personalisation across touchpoints is essential for driving engagement and conversions. Users no longer move through websites in a straight line. They might land on a homepage or jump into product pages. Users may explore the site in a non-linear way. Regardless of how they navigate, the expectation is clear. Personalised messages should remain consistent throughout the journey.
Consider a scenario where your business offers a 20% discount on a select range of products. Rather than showing this offer only on the homepage, multi-page personalisation ensures the discount is visible everywhere. This reinforcement helps maintain awareness of the promotion. It encourages users to take advantage of the offer and drives conversion.
Multi-page personalisation goes beyond the tactics of single-page campaigns. It applies targeted messaging, whether a discount, recommendation, or loyalty benefit. This occurs across all pages where the customer might engage. The approach strengthens the promotional message and builds trust through a coherent experience. This happens regardless of how the user navigates.
In this article, we explore how businesses can leverage Adobe Target to implement multi-page personalisation. First, we’ll uncover the key benefits of maintaining a consistent message. Then, we’ll dive into configuration options tailored to different site architectures. To wrap up, we’ll share actionable best practices for scaling your personalisation strategy.
What is Multi-Page Personalisation?
Multi-page personalisation delivers a consistent and contextually relevant experience to users as they navigate different pages. It ensures content, offers, and messaging align with the user’s interests across the entire journey.
A clear example of this can be seen on the Vodafone UK website. When a returning visitor is recognised as an existing customer, a personalised message appears at the top of the screen. It prompts them to log in to upgrade or purchase an additional plan. This message isn’t limited to the homepage. It follows the user across different pages, maintaining visibility throughout their browsing session.
Key Benefits of Multi-Page Personalisation
Stronger user engagement: Personalisation that flows across pages helps keep users interested and increases time spent on site.
Higher conversion rates: Consistent messaging across the journey reduces friction and encourages desired actions.
Customer loyalty and retention: A seamless personalised experience increases user satisfaction and return visits.
Smarter optimisation through data: Tracking user behaviour across multiple pages provides insights that help refine personalisation strategies.
How to Configure Multi Page Personalisation in Adobe Target?
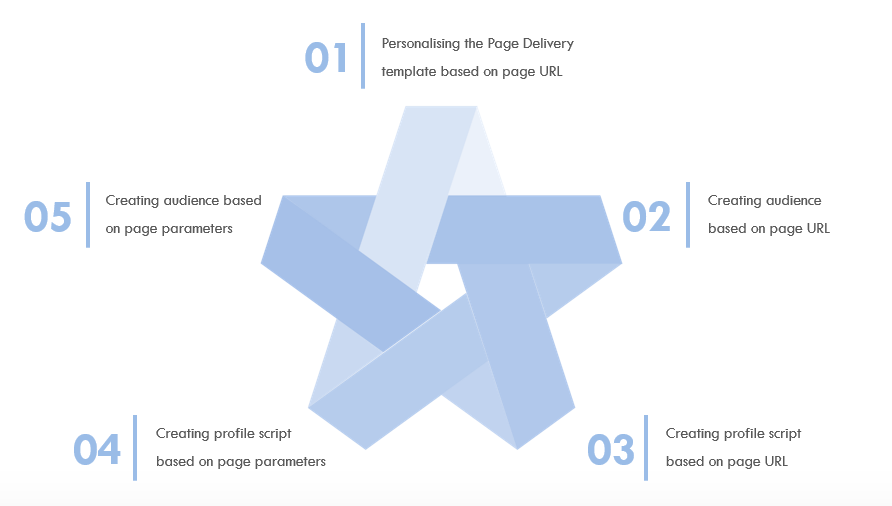
There are several methods to configure multi-page personalisation using Adobe Target as given below.
1. Using Page URL – Page Delivery
- We can target multiple pages using page urls in the page delivery option while configuring an Adobe Target activity.
There are various methods for configuration :
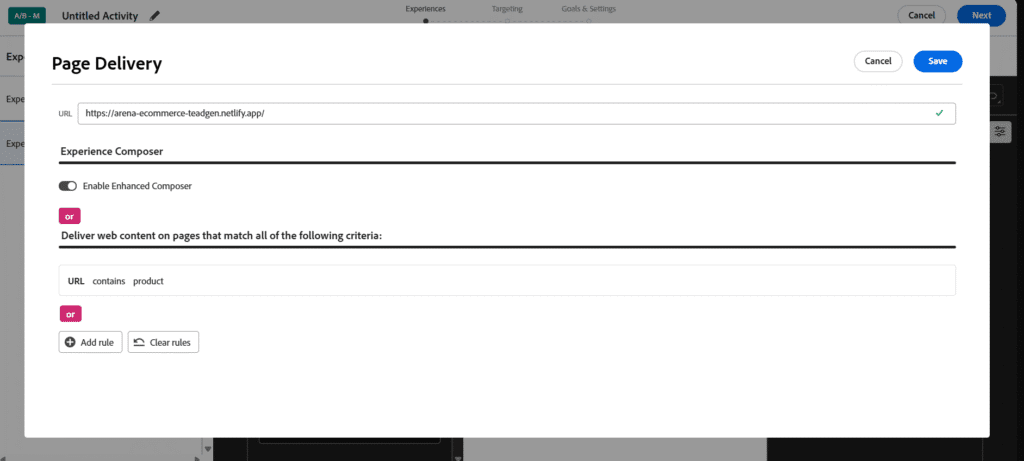
Under the Page Delivery section – additional template rules , select URL and add specific rules like “URL starts with” and enter the common starting path of the product page URL.
You can also select , specific rules like “URL contains” and mention the common part that all the product pages contains like “Product”.
You can also use “is equal to” and enter the URL of the product pages separately.
Finally , You can even use “is equal to” and enter the URL of the product page together in the same rule.
Tip: Instead of adding each URL separately in an OR condition, you can pass all of them at once in a single rule for efficiency.
2. Using Page URL – Audience
We can target multiple pages using page URLs by creating audience while configuring an Adobe Target activity.
There are various methods for configuration :
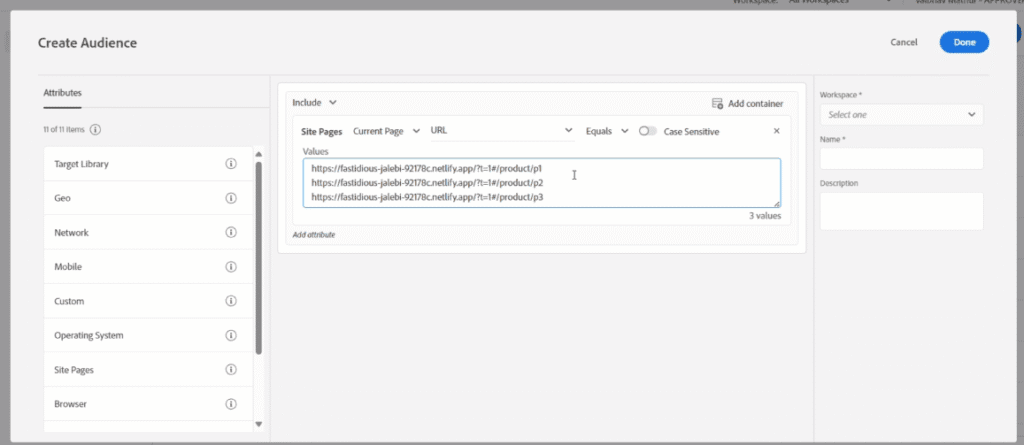
While creating an audience , select the rule Site Pages – Current Page – URL equals “Page URL”. Then add more page URLs by again adding the similar rule as given above in an “OR” condition
While creating an audience , select the rule Site Pages – Current Page – URL equals and inside the values , you can enter all the product pages at once where you want the experiment to be shown.
While creating an audience , select the rule Site Pages – Current Page – URL Starts with. Then inside the values , enter the common starting part of all the product page URLs
While creating an audience , select the rule Site Pages – Current Page – URL contains. Then inside the values , enter the common part of all the product page URLs.
3. Using Page Parameters – Audience
- We can target multiple pages using page parameters by creating audience while configuring an Adobe Target activity.
There are various methods for configuration:
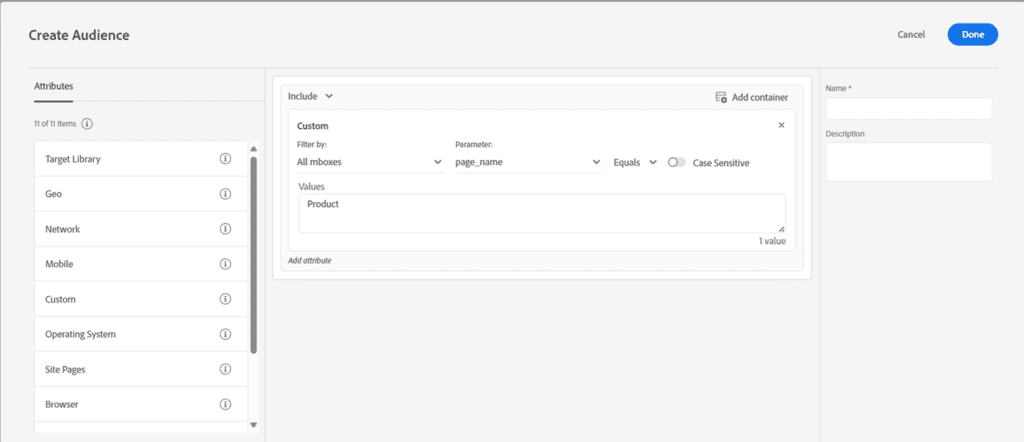
While creating an audience , select the attribute Custom- All mboxes – Parameter and select the parameter as the parameter name key which is passed and from the drop down , we can select “Equals”. Then , inside the value , enter the required parameter value.
We can also select “Parameter is present” , incase the parameter is being passed on the destination pages only.
4. Using Page Parameters in Profile Script
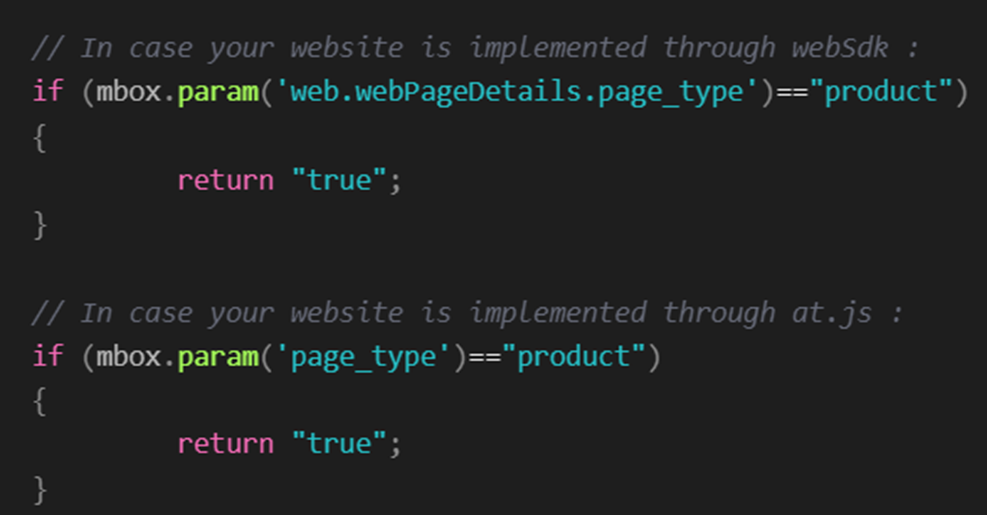
For more complex scenarios across websites and apps, profile scripts let us store page-level information and build dynamic audiences using the page parameters.
- We can create a profile script using the page parameters provided in the page and use that profile script to create and target an audience within our Adobe Target activity.
5. Using Page URL in Profile Script
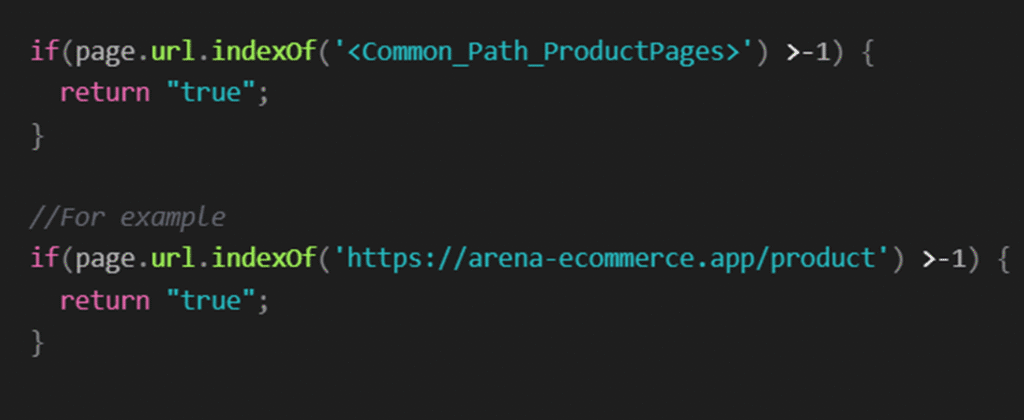
This can be a flexible approach if you’re working with websites that require more custom logic in audience creation using the page URL.
- We can create a profile script using the code snippet given below by utilising the page url and use that profile script to create and target an audience within your Adobe Target activity.


What do you think?
Multi-page personalisation is crucial for customer retention and brand consistency. Adobe Target’s capabilities in this space are well-highlighted in this piece!
Thanks for simplifying a complex topic like multi-page personalisation, Vaibhav!
What do you think?
Multi-page personalisation is crucial for customer retention and brand consistency. Adobe Target’s capabilities in this space are well-highlighted in this piece!
Thanks for simplifying a complex topic like multi-page personalisation, Vaibhav!